Skip to main content
3633 Harden Road #200 Raleigh, NC 27607
919.785.0505
Follow Us on Facebook
Follow Us on Instagram
Watch Us on Youtube
Follow Us on Twitter
Request Surgery Consultation
BOOK MED SPA
Home
Services
Body
Tummy Tuck
Liposuction
Mommy Makeover
Arm Lift
Thigh Lift
Bra Roll Excision Procedures
Body Contouring
Labiaplasty
Buttock Lift
Breast Procedures
Breast Augmentation
Breast Lift
Breast Reduction Procedures
Breast Implant Exchange
Breast Reconstruction
Male Breast Reduction Procedures
Face
Facelift
Deep Plane Facelift
Rhinoplasty Procedures
Eyelid Surgery
Brow Lift
Chin Liposuction
Silhouette InstaLift®
Neck Lift
Ear Pinning
Non-Surgical
AlloClae™
*NEW*
BBL™ Hero Treatment
*NEW*
Moxi™ Laser Treatment
Radiesse®
BOTOX® Cosmetic
Xeomin® & Dysport™
Dermal Filler Procedures
DiamondGlow
SkinPen® Microneedling
Chemical Peels Procedures
Dermaplaning
Medical-Grade Skincare
Photo Gallery
About Us
About
Meet The Doctors
Sanjay V. Daluvoy, MD
Matthew W. Blanton, MD
Aesthetic Team
Meet Our Team
Our Facility
Testimonials
Patient Testimonials
Patient Reviews
Patient Resources
Patients Resources
Treatment Quiz
Plastic Surgery Pricing
Facelift Guide
Tummy Tuck Guide
Financing
Cosmetic Consultation
Articles & Videos
In the Media
Video Gallery
Blog
New Patient Offer
Specials & Events
Contact
Connect With Us
Follow Us on Facebook
Follow Us on Instagram
Watch Us on Youtube
Follow Us on Twitter
Thigh Lift Gallery Gallery
Back To Galleries
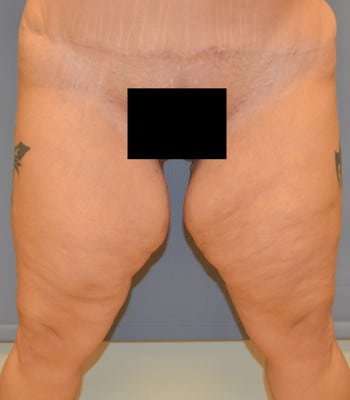
Patient 1
Procedure:
Thigh Lift Gallery
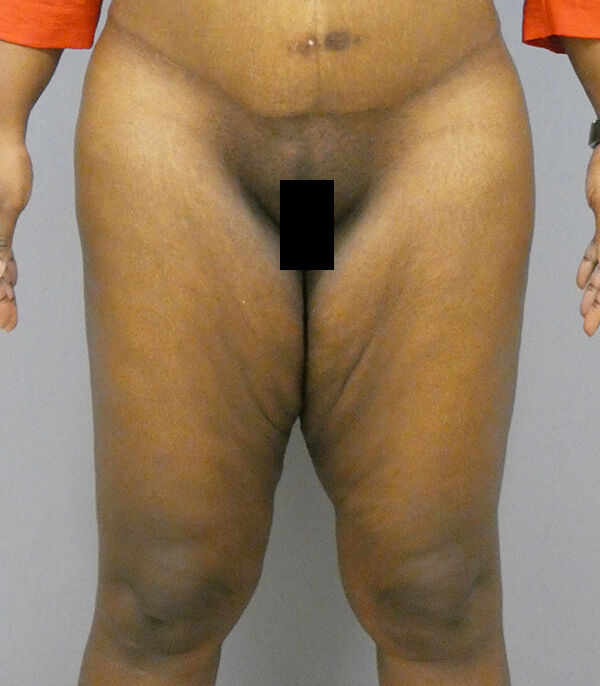
Patient 2
Procedure:
Thigh Lift Gallery
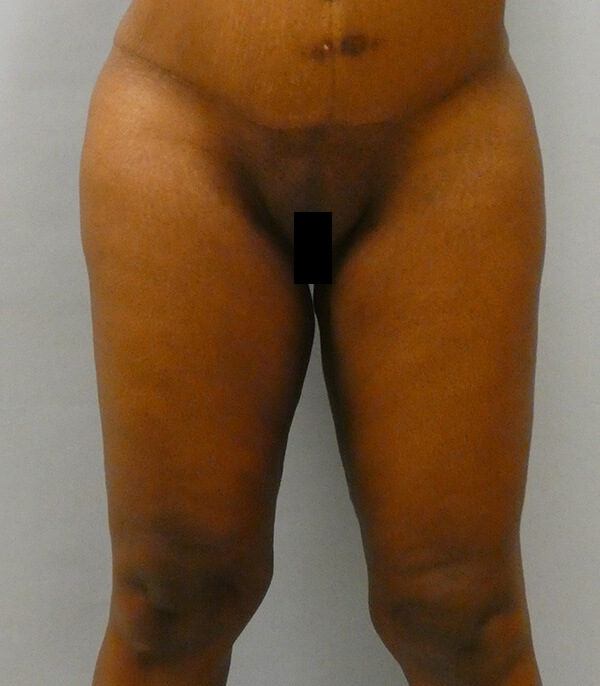
Patient 3
Procedure:
Thigh Lift Gallery
Patient 4
Procedure:
Thigh Lift Gallery